Hi, thank you for visiting here.See my new personal web site.Have a nice day. 👋

Building a Blog with React/Next.js, Contentful and Material-UI. And deploy it with Vercel.
ProgramingEnglish
Goal🤩
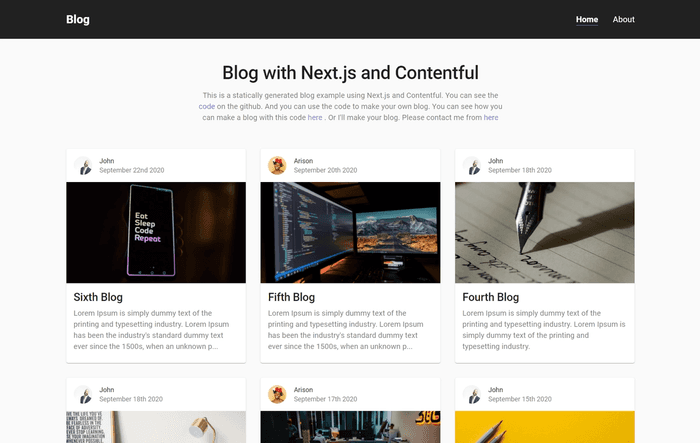
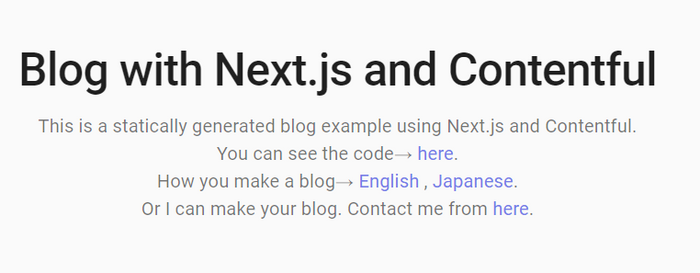
In this post, I will tell you how to make a blog with Next.js and Contentful. By the end of this post you should have a good blog like this. If you go to the blog app, you can notice that it is super fast and looks awesome and has a beautiful design on any device sizes.
We use this code to create a blog. If you want to make a blog from scratch by yourself, I would recommend that you read the documentation by Vercel or view the GitHub repository by Vercel (I used these 2 , when I made a blog demo which I will introduce to you).
Requirements🙏
- Basic knowledge about React and Next.js
- You have already downloaded Node.js and Git.
- Basic knowledge about Git command and GitHub (ex. git add. , git commit, git push, git clone)
- Basic knowledge about Headless CMS
What we use 🔷
1. Next.js
We use Next.js to build user interfaces in this web application.
2. Contentful
Contentful is a Headless CMS. It is so popular and it makes application super fast and it is flexible.
3. Material-UI
We use Material-UI to design this blog app. Material-UI is a popular and powerful component based UI React framework.
Let's build a blog!💫
There are 11 steps to finish building this blog. I know it's a little bit long. However if you read everything, I am happy and you have a great blog. *The information in this post is from September 19th ,2020.
Step1 Creating Contentful Account
Please make a Contentful Account . You can use GitHub account, Google account, email address.
Step2 Creating Contentful Content
After you sign up, please make a new space. You can decide 「Space Name」. With an empty space, we are going to start to add our content types. Go to the 「Content Model」 section from the header tab. And we create a new Content Type by clicking the 「Add content type」 button. Be careful of spelling mistakes these will cause errors.
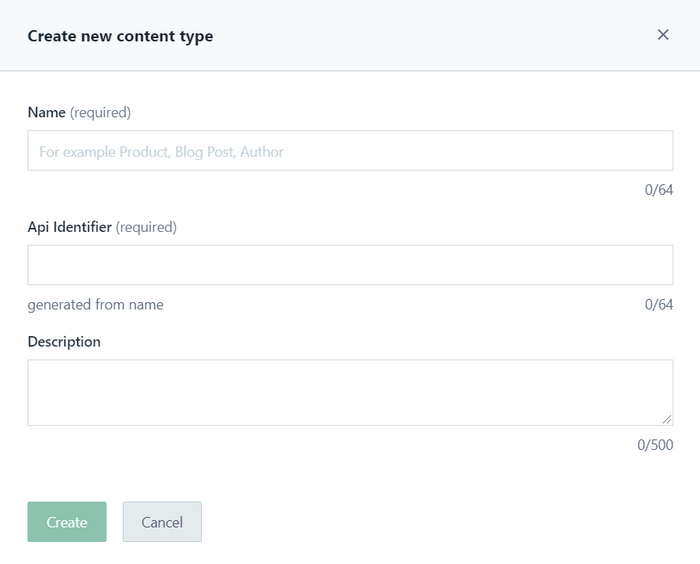
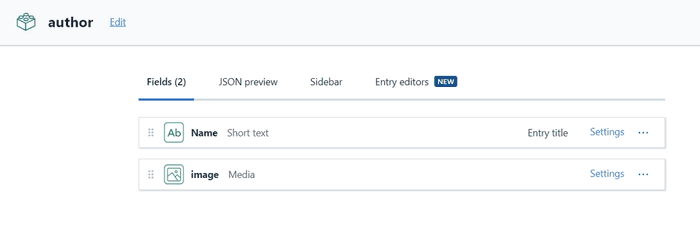
Set 「Name」 as "author" and 「Api Identifier」 as "author", then click the 「Create」 button. Then click the 「Add field」 button and add 2 fields called "Name" and "image".
- Short text → Name: Name, Field ID: name
- Media → Name: image, Field ID: image
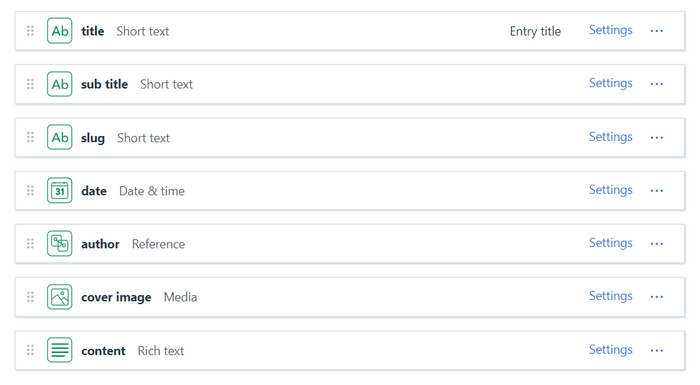
Create one more Content Type called "post". Click the 「Add content type」 button. Set 「Name」 as "post" and 「Api Identifier」 as "post", then click the 「Create」 button. Then click the 「Add field」 button and add 7 fields.
- Short text → Name: title, Field ID: title
- Short text → Name: sub title, Field ID: subTitle
- Short text → Name: slug, Field ID: slug
- Date & time → Name: date, Field ID: date
- Reference → Name: author, Field ID: author
- Media → Name: coverImage, Field ID: coverImage
- Rich text → Name: content, Field ID: content
Okay, we finished setting 「Content Model」. Now, go to the 「Content」 section from the header tab. Set 「Content type」 is「author」 , and click the 「Add author」 button, then add 「author」. Like you did with 'author', please add 「post」. You can choose how many posts you add.
Step3 Clone code from GitHub
We use code which I made as a starter. Please make a folder for this blog project. And then, please paste the following code in the command line.
git clone https://github.com/SatoruAkiyama/blog-with-nextjs-and-contentful.gitThen , click the Enter key. After that, you can see the file called 「blog-with-nextjs-and-contentful」. Open the file in your coding editor.
Step4 Creating Space ID and Content Delivery API - access token
To fetch data from Contentful, we need the "Space ID" and "Content Delivery API - access token". Click the 「Settings」 tab and choose the 「API Keys」 option, then click the 「Add API Key」 button or choose default which exists already. With the keys which you chose, make a note of both the "Space ID" and the "Content Delivery API - access token", these will be used later on.
Next, create a .env.local file at the root of your project directory with the following code.
NEXT_PUBLIC_CONTENTFUL_SPACE_ID=your Space ID
NEXT_PUBLIC_CONTENTFUL_ACCESS_TOKEN=your Content Delivery API - access token
1Now, we are ready to display the blog app. Install npm packages by npm install . Then, build a local server by npm run dev. Then open http://localhost:3000/ . Now you should see awesome blog app. I hope you don't have any errors
Step5 Get data from Contentful
In /lib/index.js , I defined all functions to fetch data from Contentful.
// lib/index.js


const client = require("contentful").createClient({
  space: process.env.NEXT_PUBLIC_CONTENTFUL_SPACE_ID,
  accessToken: process.env.NEXT_PUBLIC_CONTENTFUL_ACCESS_TOKEN,
});

// get all posts
export async function getAllPosts() {
  const entries = await client.getEntries({

    // get data if the contentType matches post
    content_type: "post",

    // order results
    order: "-fields.date",
  });
  if (entries.items) {
    return entries.items;
  }
  console.log(`Error getting Entries for ${contentType.name}.`);
}

// get a post by slug
export async function getPostBySlug(slug) {
  const entries = await client.getEntries({
    content_type: "post",

    // number of getting data
    limit: 1,

    // filtering getting post by slug
    "fields.slug[in]": slug,
  });
  if (entries.items) {
    return entries.items[0];
  }
  console.log(`Error getting Entries for ${contentType.name}.`);
}

// get 3 latest posts
export async function getMorePosts(slug) {
  const entries = await client.getEntries({
    content_type: "post",
    limit: 3,
    order: "-fields.date",

     // filtering getting post by slug
    "fields.slug[nin]": slug,
  });

  if (entries.items) {
    return entries.items;
  }
  console.log(`Error getting Entries for ${contentType.name}.`);
}

function parsePostSlug({ fields }) {
  return {
    slug: fields.slug,
  };
}

function parsePostSlugEntries(entries, cb = parsePostSlug) {
  return entries?.items?.map(cb);
}

// get all existing URL
export async function getAllPostsWithSlug() {
  const entries = await client.getEntries({
    content_type: "post",

    // getting value of slug
    select: "fields.slug",
  });
  return parsePostSlugEntries(entries, (post) => post.fields);
}
If you want to know more details, you can read the Official Documentation by Contentful. We use these functions in /pages/index.js and /pages/blog/[slug].js. We call these functions in getStaticProps() and getStaticPaths(). If you want to know more about these functions, you can read the Documentation by Vercel.
Step6 Social Media
Set your social media URL. Open /data/socialMedia.js. By default , the URLs are Instagram, Facebook, GitHub and Homepage, so replace your default URL with your URL. You also can delete or add.
// socialMedai.js


// replace default with your URL

export const socialMedia = {
  instagram: "https://www.instagram.com/developer_satoru_akiyama/",
  facebook: "https://www.facebook.com/satoruakiyama1998",
  github: "https://github.com/SatoruAkiyama/blog-with-nextjs-and-contentful",
  homepage: "https://satoruakiyama.com",
  // if you want to add, do like following code
  // twitter: "https://twitter.com",
};
If you changed here, go to /components/Social.js, and edit the file. You can see details of Material-icon here.
// Social.js


// example. If you add Twitter , add following code

// line 8
import TwitterIcon from '@material-ui/icons/Twitter';

// line 32 (just add ‘twitter’)
const { instagram, facebook, github, homepage, twitter } = socialMedia;

// and paste following code under the line 98
<Grid
  item
  component={"a"}
  target="_blank"
  rel="noreferrer noopener"
  href={twitter}
>
  <TwitterIcon className={classes.snsIcon} />
</Grid>
Then you can see the Twitter icon in the footer and the about page.
Step7 About Page
Open /pages/about. Here, edit name, picture and introduce text.
// about.js


// line 31
const name = "Your name"

// line 33
const avatar = "Your picture"

// under the line 71, type your introduction
Step8 meta tag, Page title
Finally, we set <title> and <meta name="description" content=""/> In this blog app, the value of <head></head> is given to /components/layout/Layout.js as props. Open /pages/index.js and /pages/about.js. Change the page title and page description.
// index.js


// line 19 value of <title> tag
title="Page title"

// line 20 value of <meta name="description" content=""/> tag
description="Page description"
// about.js
// line38 value of <title> tag
title="page title"
// line39 value of <meta name="description" content=""/>
description="page description"Step9 Homepage Header
Change this component. Open /components/PageHeader.js. Please edit or delete this component. If you delete it, go to /pages/index.js. And delete the code which uses the PageHeader component.
Step10 Deploy
Okay, we finish building our amazing blog app. Now, we publish the blog with Vercel. First, please make a new git repository. After that, paste git remote set-url origin 'your repository URL' in the command line then press Enter key. And do 「git add. , git commit, git push」 Next create the Vercel account with connecting your GitHub account from here. Then we import our project from GitHub Repository.
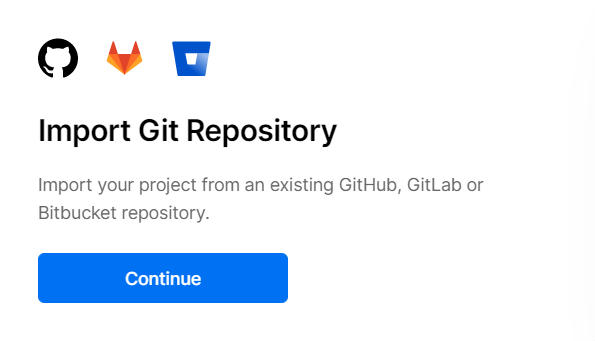
After clicking the 「Continue」 button, they ask you for URL of the GitHub repository. So paste your URL of the repository which you use for this blog app. Next, you will see this.
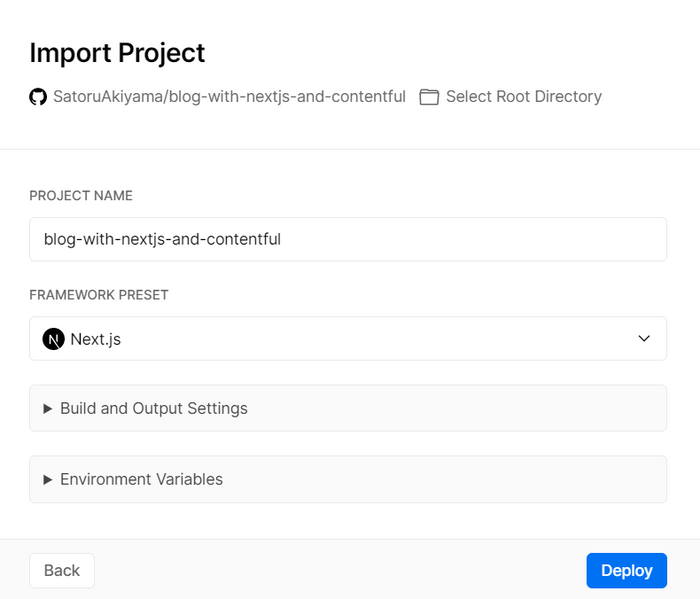
Before clicking the Deploy button, we should set Environment Variables. We set「Space ID」and「Content Delivery API - access token」.
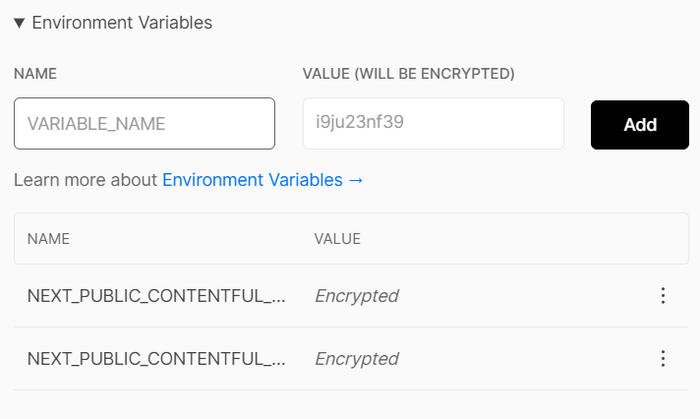
Set Environment Variables.
NAME as「NEXT_PUBLIC_CONTENTFUL_SPACE_ID」, VALUE as「Your Space ID」. Then click the Add button.
And then, set NAME as 「NEXT_PUBLIC_CONTENTFUL_ACCESS_TOKEN」,VALUE as 「Your Content Delivery API - access token」. Click the Add button. After this, you can set 2 Environment Variables, click the Deploy button.
After finishing deployment, your blog will be published. Good job!!
Step11 Customizing
If you want to have more pages(like Contact page), go to /data/routes.js. And add the page data to the routes array. This way you automatically add the link to the page to the nav menu and footer. After that, make a file in the pages folder. If you want to change design, please refer to the Material-UI documentation.
Finally😎
Thank you for reading this post. I would be glad for any comment like impressions, bugs, what you don’t understand about this post from you. Also, if you make a blog with this post and send me the URL, it makes me happy to have written this post.
postscript (November 23, 2023)
select a project from dashboard page.- move to Settings tab.
・go to General->Build & Development Settings. - set "npm install: --legacy-peer-deps" as "install command".
- go to Environment Variables
- add [Key: NODE_OPTIONS] [value: --openssl-legacy-provider].
Share
If you like this post, please share!
Thank you for visiting my website. I would be glad if you like this website and continue having an interest in me.
Don't hesitate to contact me. 😎
![]() Satoru Akiyama
Satoru Akiyama